I finally mustered the courage to bake my very first loaf of bread. Properly. Without a bread machine or even the dough hook on my Kenwood Chef. Just good old fashioned mixing and kneading and proofing and bashing and shaping and rising and baking...
I naturally turned first to Nigella Lawson's recipe for "The Essential White Loaf" in How to be a Domestic Goddess. The recipe seemed simple enough. Apart from bread flour, yeast and salt. It called for butter as well as potato water to give the bread a light crumb and last longer.
As much as I enjoy reading her recipes. I must say that this recipe failed totally for me. It clearly was not written for a total novice at bread baking. I can understand that Nigella cannot possibly tell me exactly how much water I need, since this will depend on the type of flour and the humidity and temperature at which the bread is being prepared. But precisely because of this, I thought she needed to provide more information on when we knew that the dough had the right amount of water. Instead, I had to deal with "(b)e prepared to add more water, but bear in mind that you want to end up with a shaggy mess."
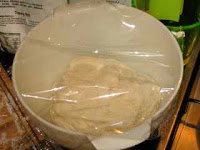
Wha?! Shaggy mess?? Is this shaggy enough for you?
And about kneading "(y)ou may need to add more flour as you do so; if the dough seems stickily wet, it means you do want a little more and often a lot more."
Huh? A little ...often...more...?
She lost me and I really didn't know what I was doing.

My mother, who has made bread before, happened to be visiting that day. She took a look at my dough and told me straight away that it needed more water. I had no clue. I though kneading it would help to soften it. But I kneaded, and kneaded, and kneaded, for almost an hour (it's supposed to take only 10 or 15mins) and still the dough was tough! Needless to say, my dough didn't rise. It was hard and tough.
I tried this recipe twice. Adding more water the second time. But still, I had no idea when enough was enough. And still it remained tough with uncooked bits of dough in the middle of the bread.
I decided that I would try other recipes before ever coming near this one again.


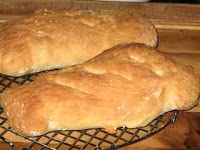
 Finally! A recipe that works! Jamie Oliver saves the day. A wonderfully easy
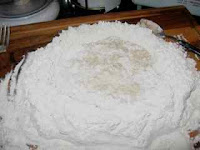
  You start by dumping all the flour onto your work surface and make a big well in it, like a volcano.
 You add the yeast and water mixture and slowly mix it with some flour till it looks like stodgy porridge. Then you add the rest of the water and mix.


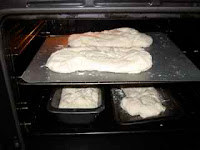
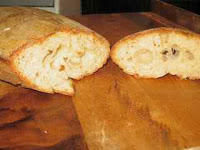
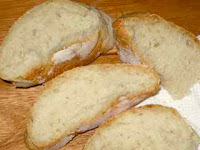
 Finally, it's time to bake the bread.
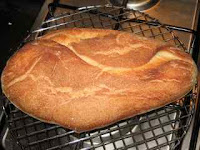 So after my two failures with Nigella's recipe. I decided I needed some proper instruction. But of course, I don't have the time to go for a bread making course. Instead, I googled. I found a cool website, called "